Behind the Scenes: Best Way to Resize Images without Losing Quality for Web
Because our websites are very photo-heavy, we often get asked the best way to resize images without losing quality. Or, in other words, how we optimize our images for web without sacrificing quality.
You can have both: high-quality images that don't take up a ton of space. We have been successfully resizing images for so many years, we have it down to a science.
Have you ever run a speed test on your website to find that your images are bogging down your site's speed? We feel you.
We've been there, yet it rarely happens on a grand scale with our tips for how to resize images. We're sharing exactly how we do it and the steps and tools you need to take to replicate our actions.
Why You Should Intently Optimize Images for a Website
The web is all about user experience. And when it comes to Google, they want to help users solve a problem or answer a question…quickly. The faster your website can do that for them and their users, the better.
One of the key aspects of making your website function faster is to specifically optimize your images for web. But how do you downsize images without losing quality? You certainly don't want to sacrifice the integrity of your photograph just to make your site go faster. Don't “rob Peter to pay Paul,” as they say.
But you can have the best of both worlds. You can have images that retain quality while significantly reducing the file size. We've done it on every post on this site including the one you're reading.
See…we did it here:
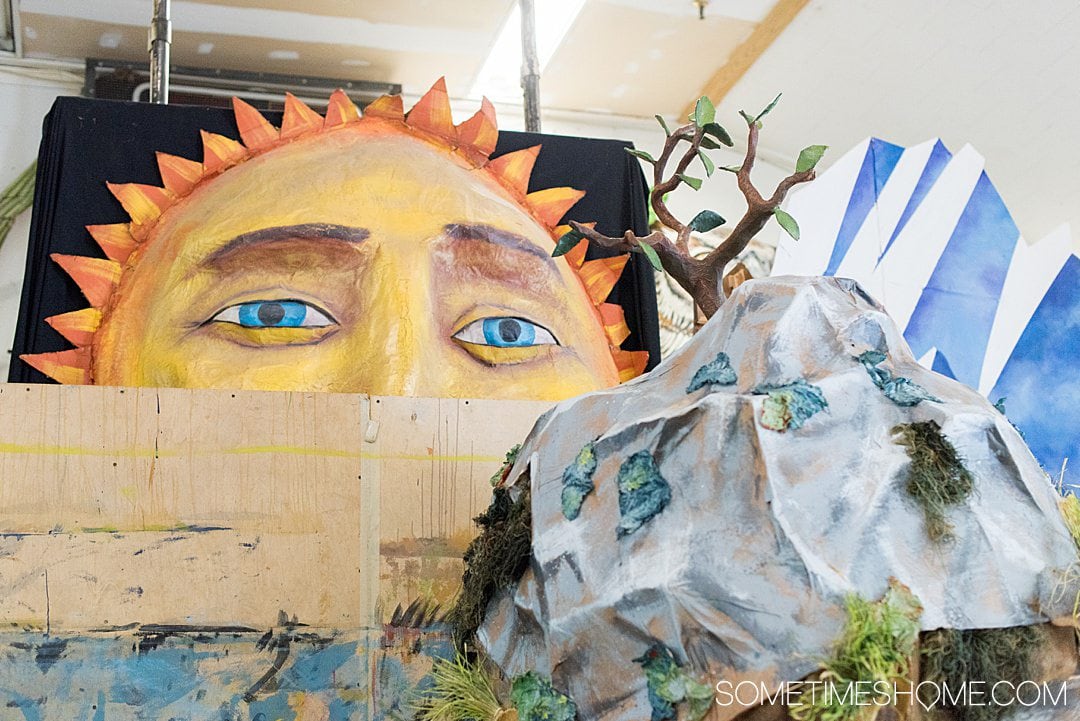
I bet that sun's peeking over to the wall to see just how we resize images without losing quality!
Why We Don't Initially Resize Our Images Online
You could resize images directly on your website with a plugin. However, this presents multiple obstacles:
- The less plugins your Wordpress site (or other website) relies on, the better. (That's because there are issues with plugins often as well, including slowing down your site, interfering with other plugins, interfering with your Wordpress theme, etc.)
- It takes a while to first upload the larger size image, then downsize it.
Why not just nip this in the bud by resizing offline, on your computer….first.
Overview of How We Resize Images, Offline
We have an incredibly organized method of editing our images when we get home from a trip.
- First create folders on our hard drives, divide the images after they transfer from a memory disk to a hard drive, then cull. We go through this in depth on our post: How to Organize and Edit Your Travel Photos: Part 1
- Afterwards, we edit our images using Adobe Lightroom and sometimes Adobe Photoshop. We cover this in our post: How to Organize and Edit Your Travel Photos: Part 2 (these programs are incredibly affordable at $9.99 per month, for both)
The steps in this post include what happens after the above. What happens when our images get to be amongst the “chosen ones”. (Kind of like how the green aliens get to be the “chosen” ones in Toy Story! Any Disney fans out there?)
An overview of the next steps we take to downsize images without losing quality are:
- Import images into BlogStomp. (This software is one of our FAVORITE things!)
- Downsize further with SpaceSaver.
- Upload to our website.
BlogStomp and SpaceSaver are part of a small company, called StompSoftware
“In 2009, two exhausted, overworked photographers devised a way to streamline one small-but-critical step of their workflow and built a tool called BlogStomp. Blog prep had never been faster or easier.
Over the years BlogStomp has grown and evolved into the powerhouse blog prep software you see today and has spawned other amazing tools like AlbumStomp for album design and SpaceSaver for JPG optimization.
Today the small team at StompSoftware continues to create new tools to make photographers' lives easier, turning out streamlined workflow tools with robust image optimization and SEO capabilities.” – Chip Gillespie, StompSoftware
When you purchase the programs you are, in fact, helping to support a small awesome business!
A Note on Why We Don't Resize Images via Lightroom
We LOVE Adobe Lightroom. I couldn't do my job without it. Truly.
But it's not how we choose to resize our images. The short answer is, we edit our photos in Lightroom and export at 300dpi and the highest quality. That's huge. While we could export the images at new settings, like 72dpi for web for starters, we don't prefer this method. It takes more time to double export the images at two different sizes. And if we don't need them all resized, why waste the space on hard drives to do this?
We only need a select few images from hundreds we export from a trip. Let's take a recent trip to Spain for instance. Our final edit and export from Valencia and Barcelona were approximately 1,020 images. We loved writing about things like food in Barcelona and the Fallas Festival in Valencia to share with you but we only needed about 45 images for those posts.
The best way to resize images without losing quality in this case is with BlogStomp and SpaceSaver, not Lightroom, for this main reason. (The programs also just do a better job to achieve our goal than Lightroom does.)
Already Convinced and Know You Want to Buy? Go Directly to the Shop…
If you're like me when you see a good product you want to jump on a purchase. I don't blame you. We're speaking the same language.
Follow the links below for pricing options and additional details:
>>> Click here to buy BlogStomp <<<
>>> Click here to buy SpaceSaver <<<
They're SO LOW priced and affordable. And it's a lifetime license! You buy it ONCE.
There are two options to buy with BlogStomp:
- Single User
- Studio Pack: up to 5 licenses on either a PC, Mac or both
There's only one option to buy with SpaceSaver:
- Your one license purchase allows installation on up to two computers
We signed up to be a part of their affiliate program when they emailed some hefty users of the programs to let them know they started an affiliate program. And why wouldn't we want to spread the gospel about them? We do it anyway, so this is a nice perk for us evangelists, so to speak.
Disclosure: If you purchase, we make a small commission, which we greatly appreciate. It helps us keep Sometimes Home going to continue to bring you more great content.
Detailed Information on Shrinking Our Images without Losing Quality, Step 1: BlogStomp
Let's break down the bullet points above, step by step.
Set Up BlogStomp to Watermark and Rename Your Images
We have been using BlogStomp for years. About 6 years, to be more specific. The company that made BlogStomp, called StompSoftware, is great. And so are their products.
We use BlogStomp to watermark and rename our images. (Skip this step if you don't have a desire to do either, but we recommend you rename your images, at least, for good SEO practices.)
Once you download the program you'll be able to adjust your settings. You only have to do this once, or as needed as you include additional dimensions and such. (For example, we have one size we like our blog post images to be, at 1080 pixels, and another size we like our “Featured Image” photo to be, at 1400px. This is simply because of the way we've chosen to feature posts on our website.)
Here's what else you can set:
- How far apart your margins are if you're creating side-by-side images (like a diptych or “Diptic” as apps call it these days), in pixels.
- If there's a tab at the bottom of your images (where you can also place your watermark, if you like).
- Add additional dimensions and templates.
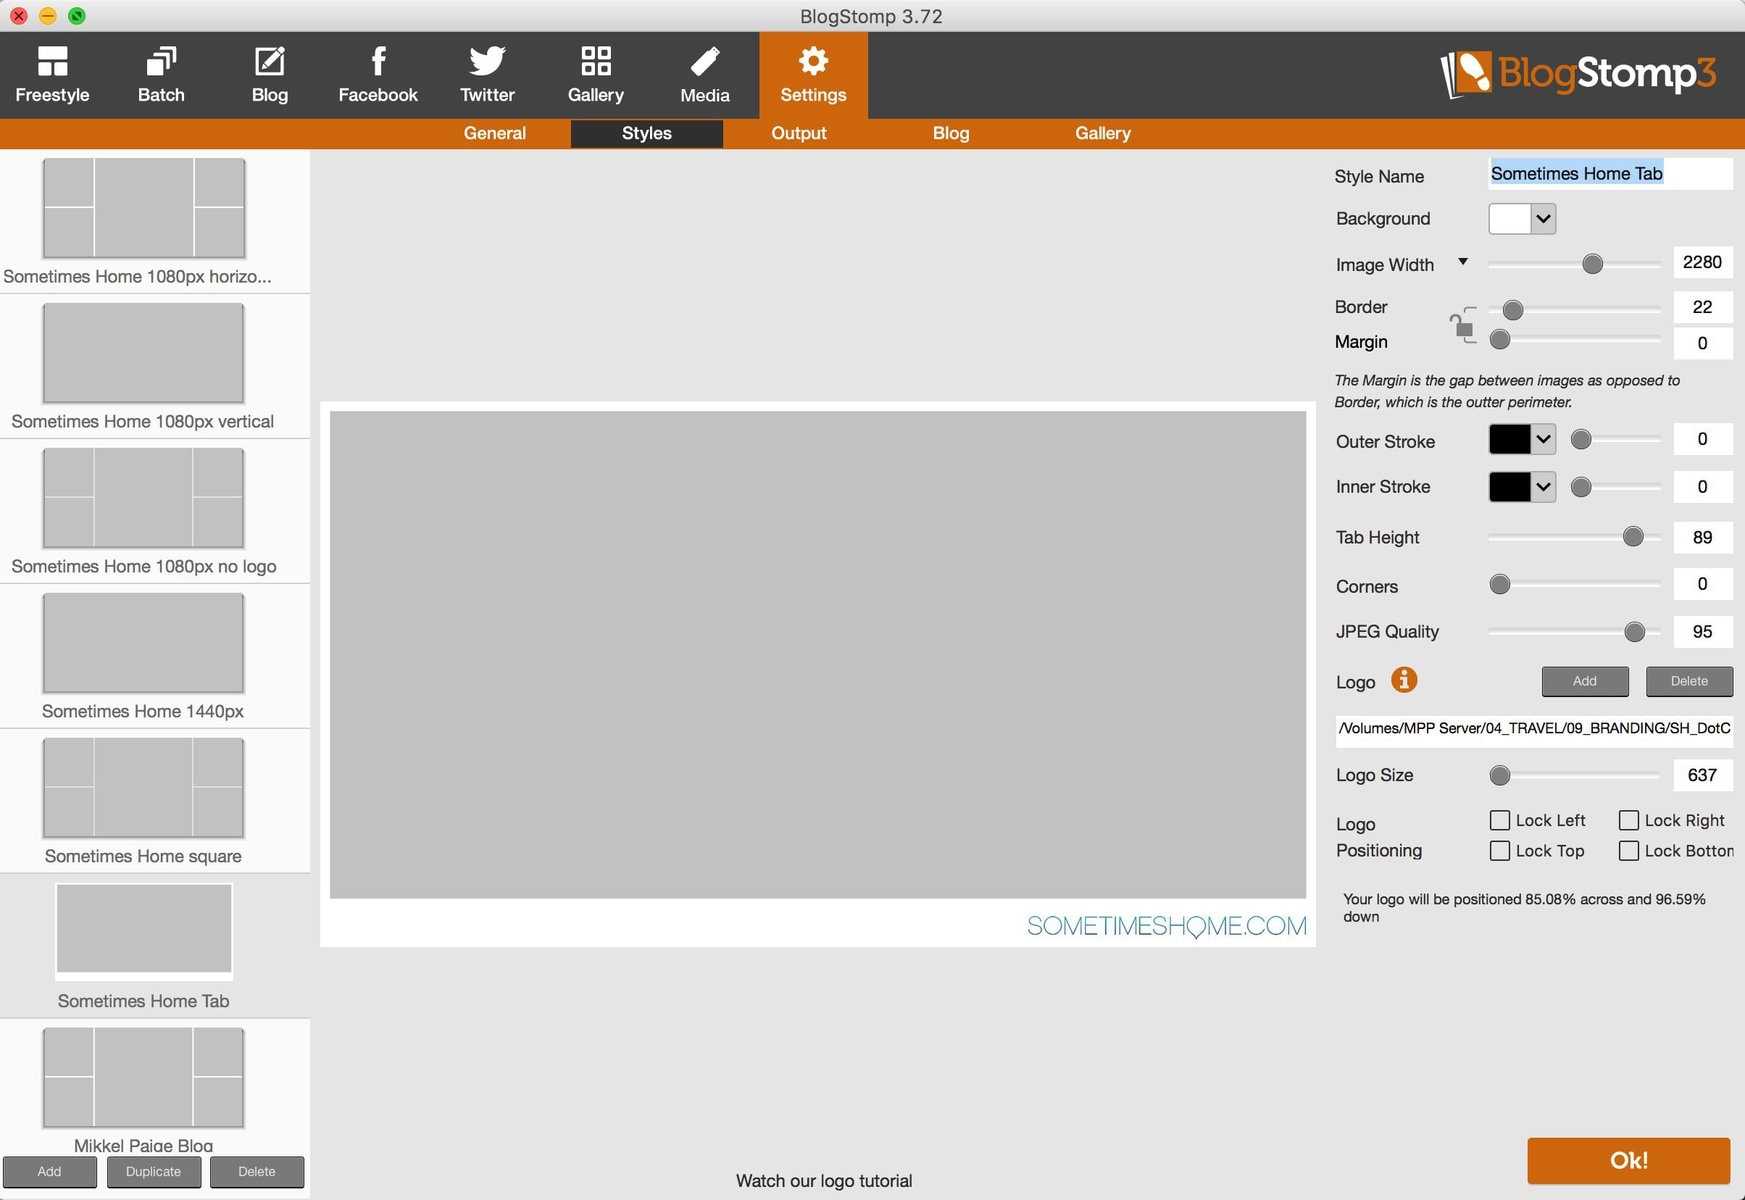
Here's a screenshot of a setting I made in BlogStomp. I included a tab and a border and our logo (or watermark) at size: 637. Overall, the image will be resized to 2280px wide, as you can see in the “Image Width” setting:
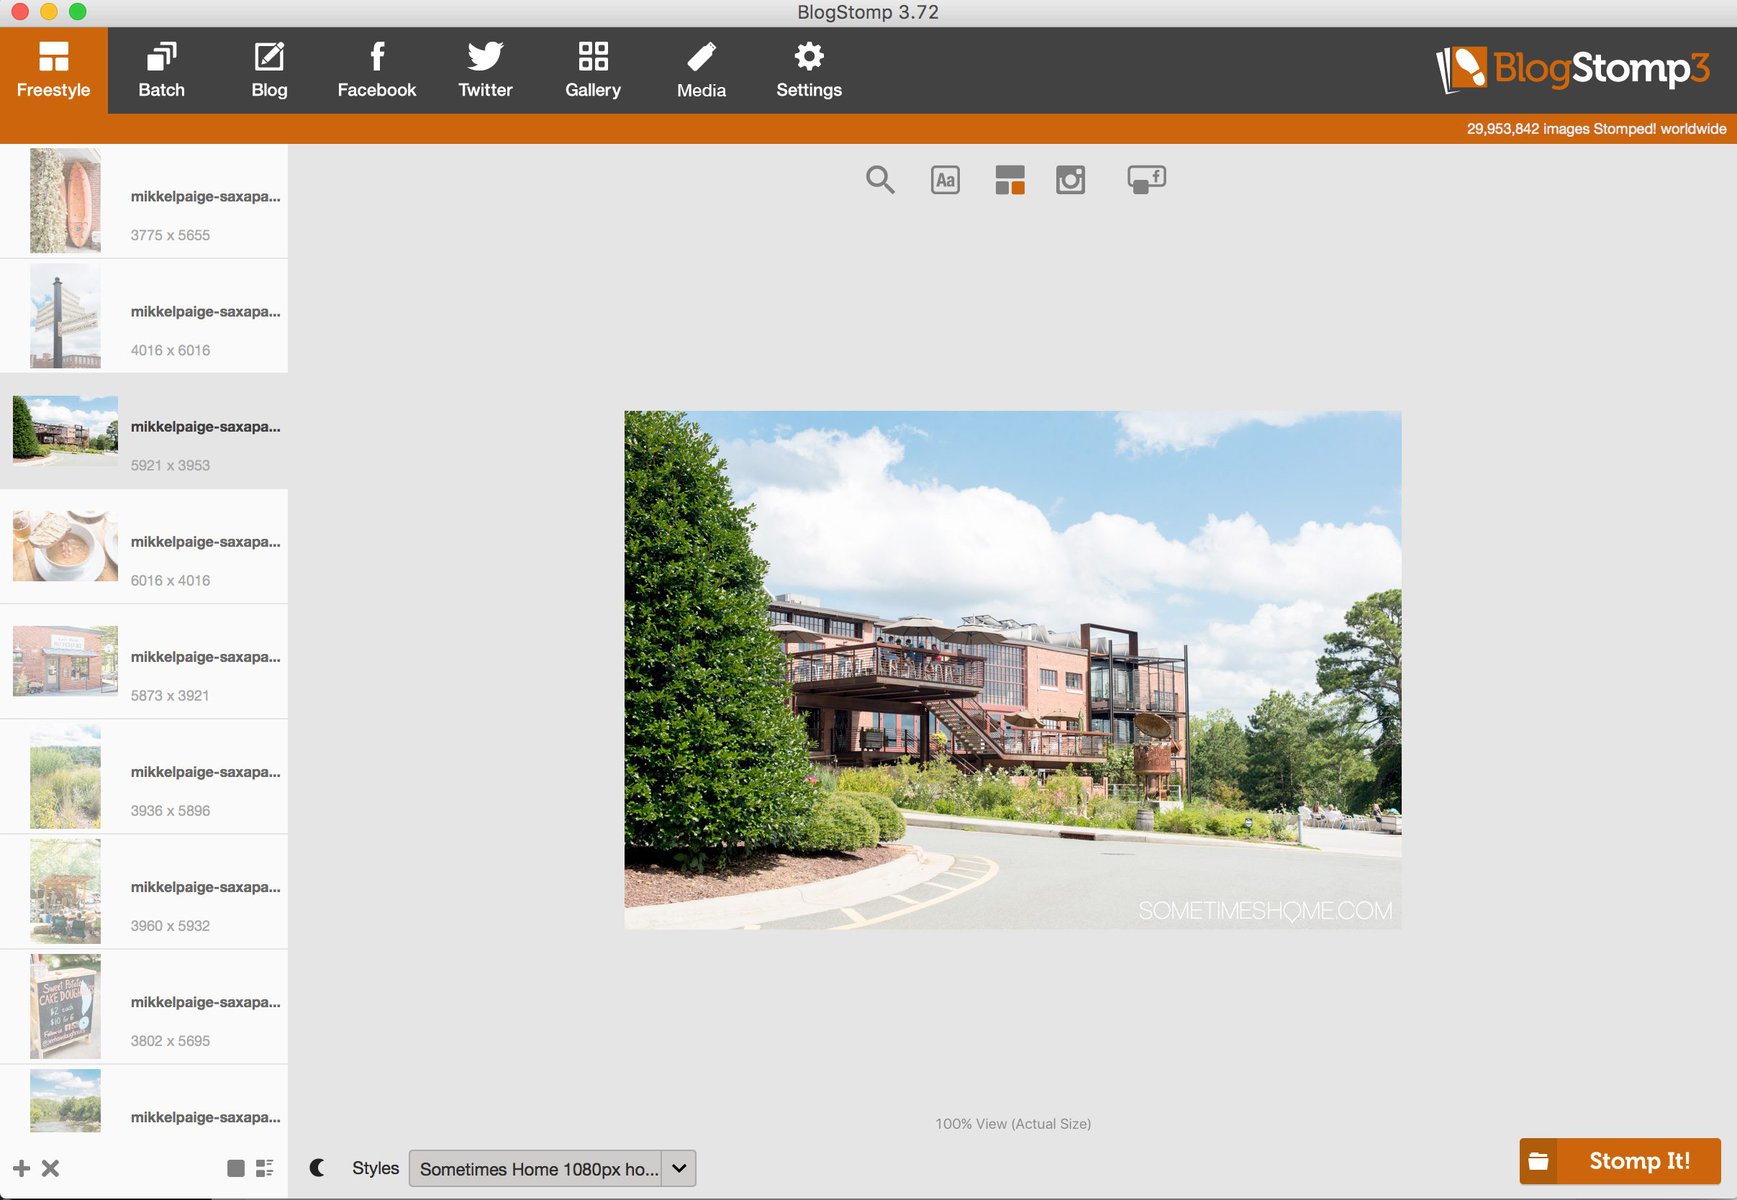
When I go to the setting in “Freestyle” or “Batch” and add an image, this setting I created will look like this (you have to import images into the program, then select the image):

Or you can simply create a style that adds a logo/watermark on top of your image, like I do for Sometimes Home (you can see it faintly on the lower right-hand corner):
There's an endless amount of ways you can set your images up to be processed. At the very least, like we mentioned above, you can use this program to ensure a uniform width on your images being uploaded online and rename them.
Here's how we rename the images we're optimizing for web within BlogStomp:
- Navigate to the “Settings” tab up top. Choose “Output” underneath it.
- Be sure it's saving to the folder of your choice on your hard drive in “Saving Folder“. (I always save it to the same “Stomped!” folder so I can easily find them because I'm going to take things a step further with SpaceSaver after I do what I need to in BlogStomp.)
- Rename the image. You can do rename it to whatever you like, but I always rename it to something custom that has to do with SEO terms I am targeting, generally speaking. Or, if it's from a wedding I photographed, I rename the images with my business name + the couples' names.
*** BE SURE YOU HIT THE ORANGE “Ok!” BUTTON to SAVE YOUR SETTINGS. ***
If you want to make a slight variation of a setting you created all you have to do it find the style in Settings > Styles, then hit “Duplicate” on the lower left hand column in the program.
I recommend changing the name of the setting you duplicated, then hitting “Ok!” to save it once you're happy with it. Otherwise it'll just be titled with “copy” at the end of the name.
Import Images into BlogStomp
It's incredibly easy to import images into BlogStomp, using one of two methods:
1. Drag and Drop: navigate to the images on your computer and drag and drop them to the left-hand column in “Freestyle” or “Batch”.
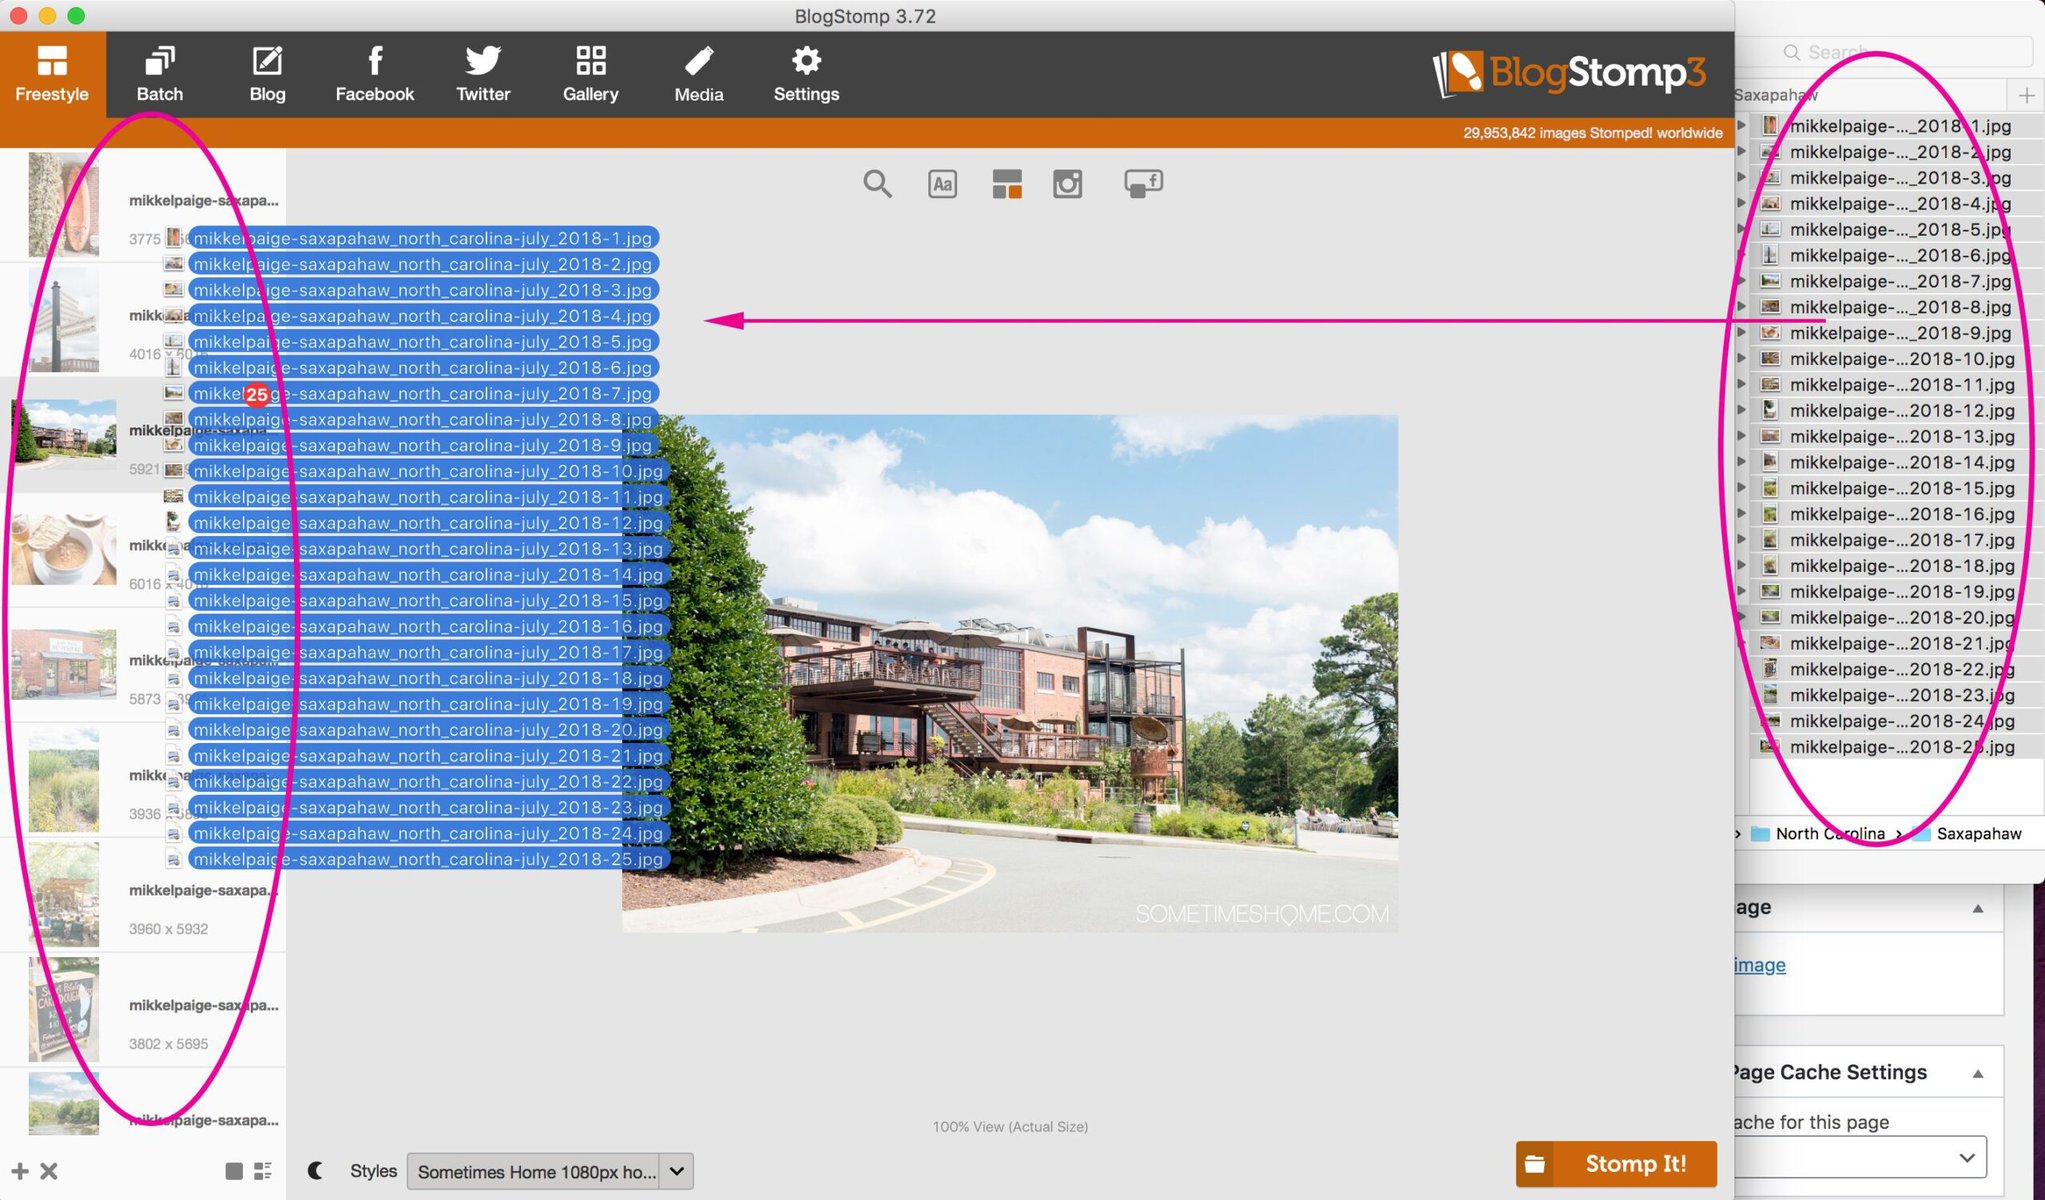
2. Load them from BlogStomp: hit the plus sign “+” by the bottom of the program on “Freestyle” or “Batch”, find them on your computer or hard drive, and import.

It's simple! I'm sure you've done this for other programs so it should be a familiar step no matter if it's your first time using BlogStomp or not.
BlogStomp Your Images
Now that you've set up your styles and imported images, stomp away!
You can do this singly, by using the “Freestyle” button. Or, if you have a bunch of similar images (like all horizontal/landscape oriented that you want to apply the same style to) use “Batch” to speed up the process.
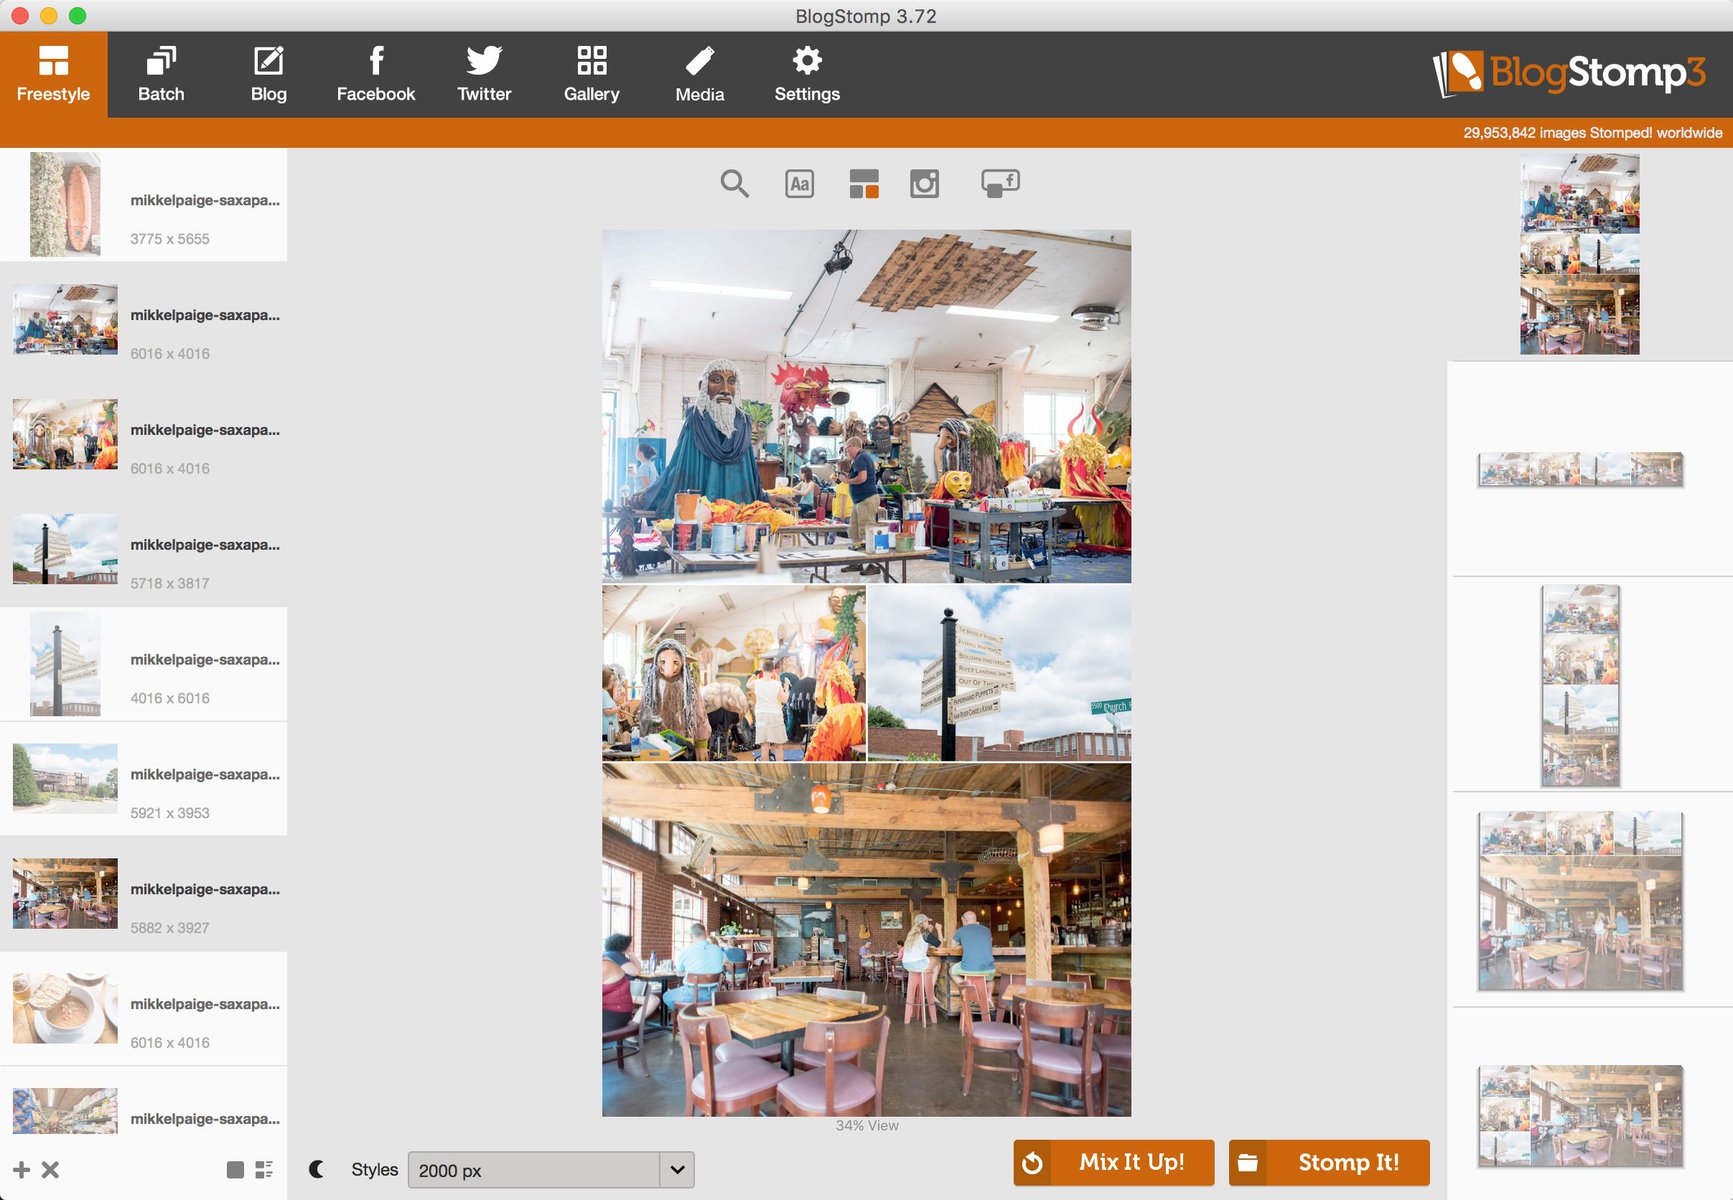
It's also very easy to create a collage in “Freestyle” in BlogStomp. I use this a lot to showcase two images, side-by-side, with a watermark.
Here's how to create a collage:
- Be sure you've selected the “style” you want to Stomp your collage at. You can do this from the “Freestyle” option, where you see a dropdown menu of “Styles” under the center preview.
- Choose your images in the left-hand column. To select multiples, hold down the shift button or control button on a Mac.
- You'll see collage styles you can select from on the right hand column.
- Your preview shows in the middle.
- Don't like how they're arranged? Simply click “Mix It Up!”, one of the two orange buttons on the bottom.
- Ready to stomp it? Click “Stomp It!” and voila!
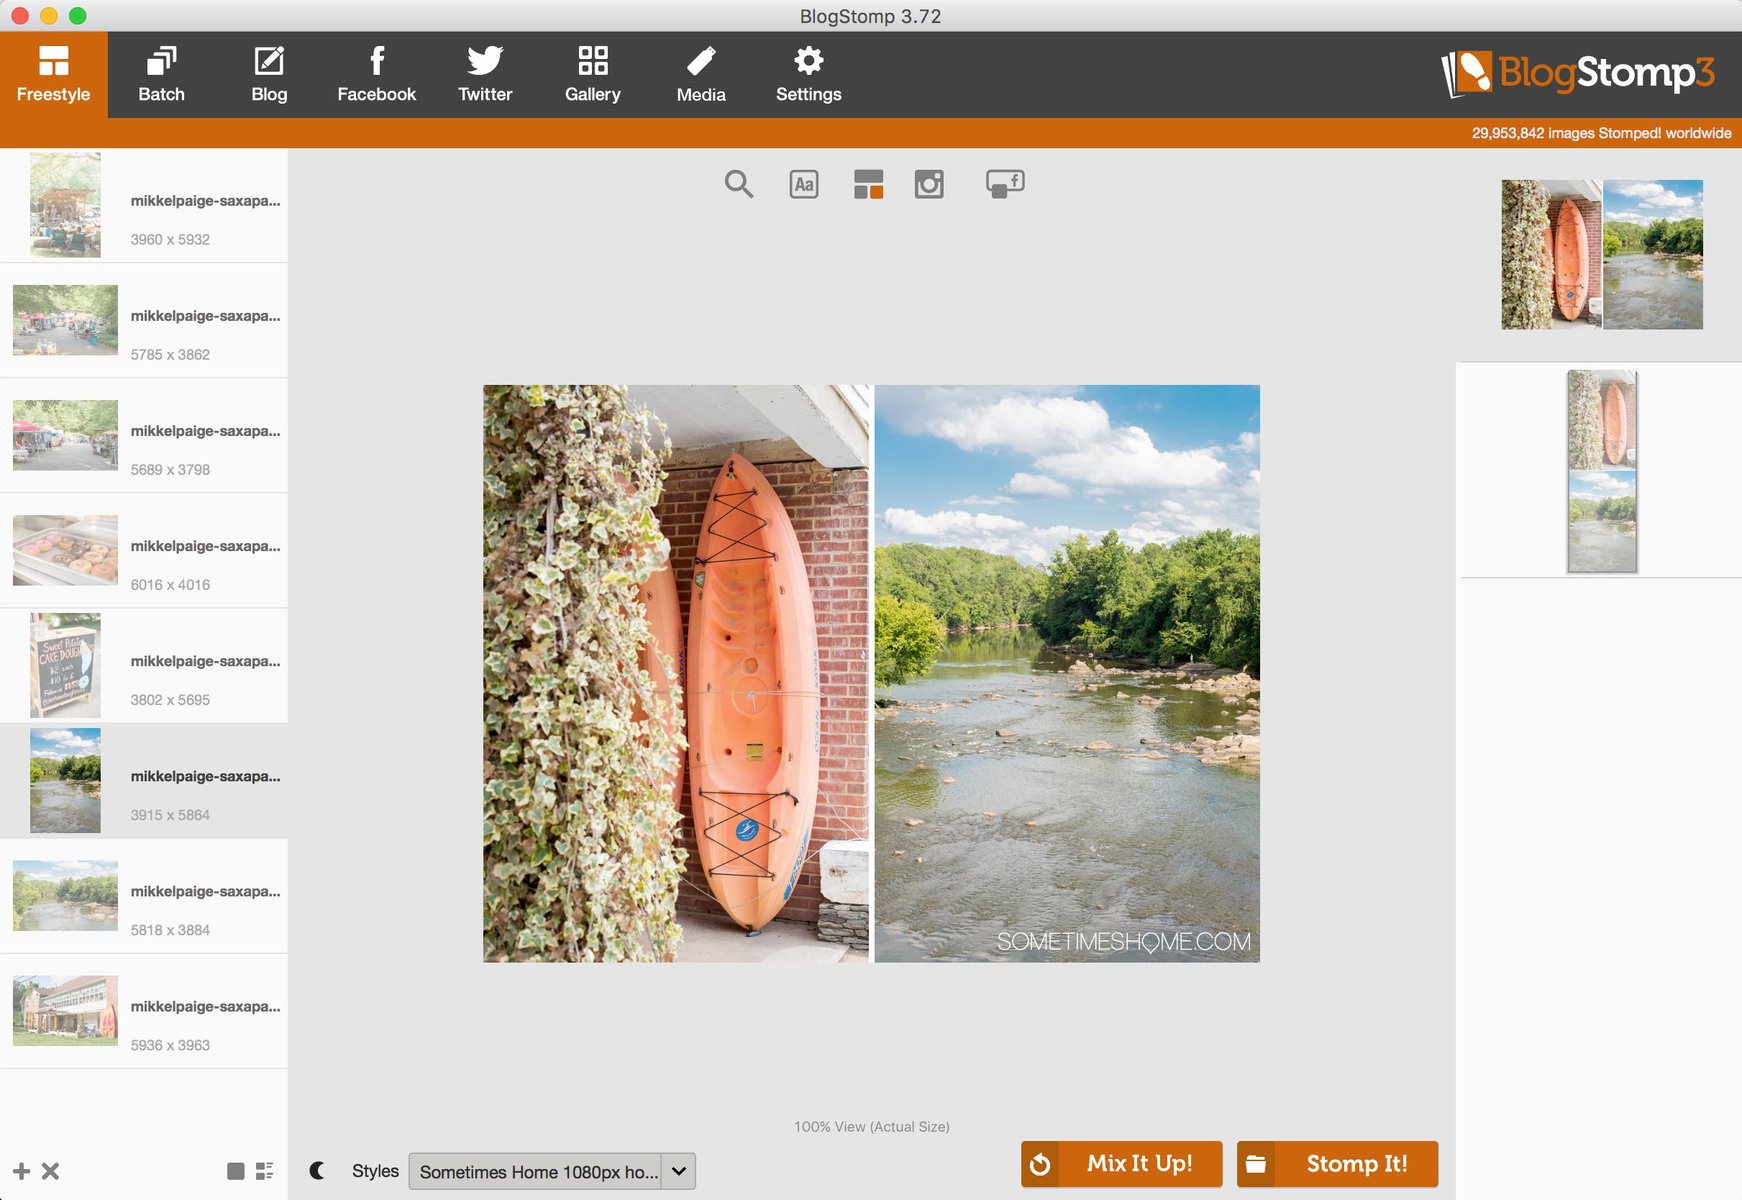
Here's a simpler collage I created with two side-by-side images and a watermark:
Stomping images – whether a collage, single images or batching, runs the process in seconds.
Your Stomped images will export to the folder you assigned in “Output”.
Your Images have Been Downsized Without Losing Quality….But Wait! There's More!
Your images should be significantly smaller now that you've run them through BlogStomp.
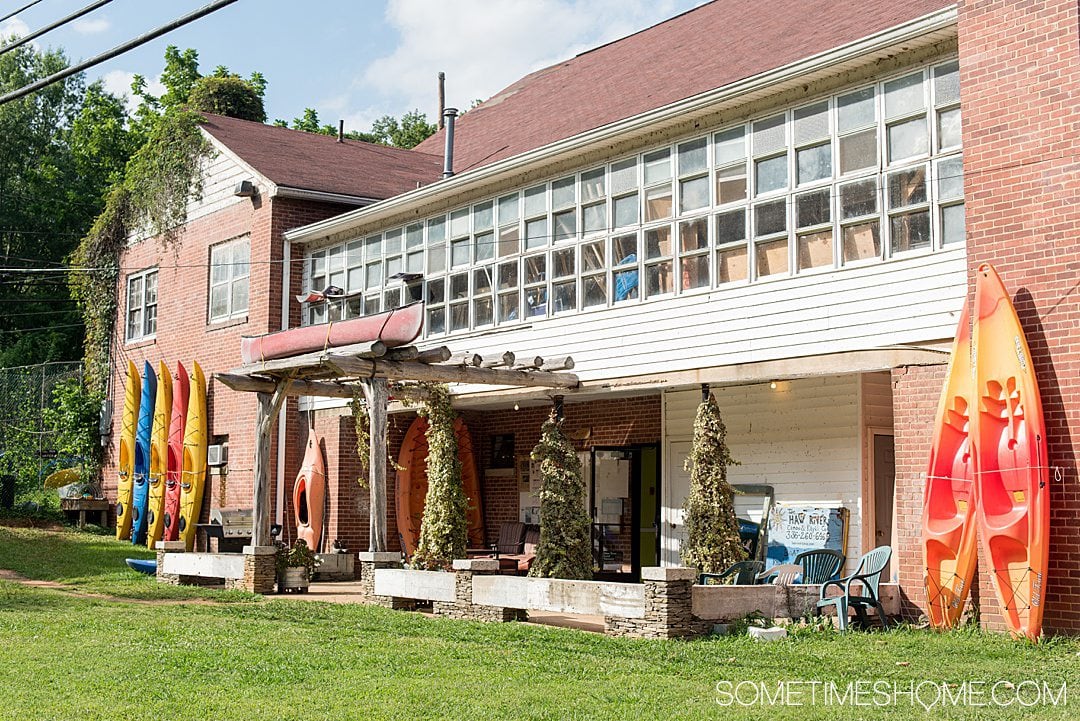
For instance, the original of the image below was 16.3MB. Yes, mega bytes. But after I Stomped it, it was only 575KB. 16.3MB to 575KB. (Image size will vary based on the pixel width you've set up in your Style in BlogStomp. Obviously a width of 2000px is going to yield a slightly larger file size than an image of 1000px.)
Not bad eh? Well…I say we can do better.
Read on for the next step that takes the image from 575KB down to 337KB.
Optimize Images for Web without Sacrificing Quality, Step 2: SpaceSaver
We can make these babies even smaller. Small-er. Because if we can do so without sacrificing image quality, why wouldn't we?
Again, the smaller the images the faster our websites load. Which means the better it is for us and our relationship with search engines like Google!
Downsize further with SpaceSaver
Years later, StompSoftware came out with SpaceSaver. And I was emailed a beta option to test it and potentially purchase it. I jumped at the chance after I was able to try to resize 500 images for free. (And you can too.) I couldn't believe it but it made my images SMALLER. And the quality? Retained.
Purchasing SpaceSaver was a no-brainer for me. I felt like I had a big secret no one knew about because it wasn't available to the public for a little while after that. But then it was! (And it's way past the beta stage now.)
SpaceSaver is even simpler than BlogStomp.
Setup Export Sizes in SpaceSaver
All your settings and options in SpaceSaver are going to be on your top toolbar (remember, I'm on a Mac computer) as seen below:
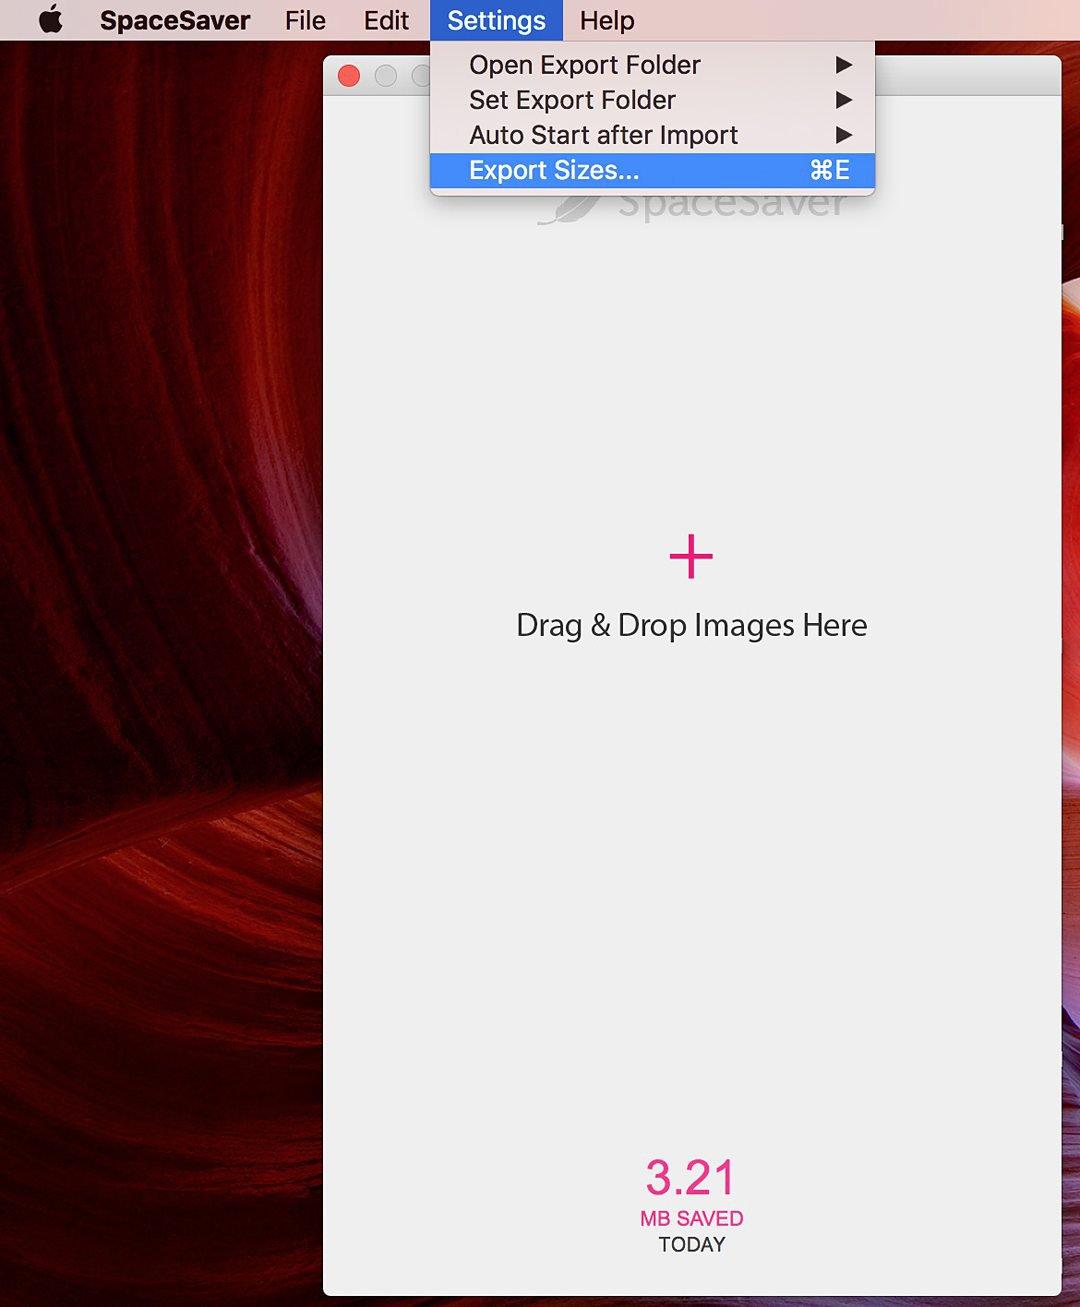
Go into your “Export Sizes” options and you can add sizes as desired. This is what my sizes look like because I already set them up in the past. But if I wanted to add a size option for 1100px, for instance, I would type it in (as seen below) and hit the “+” button.
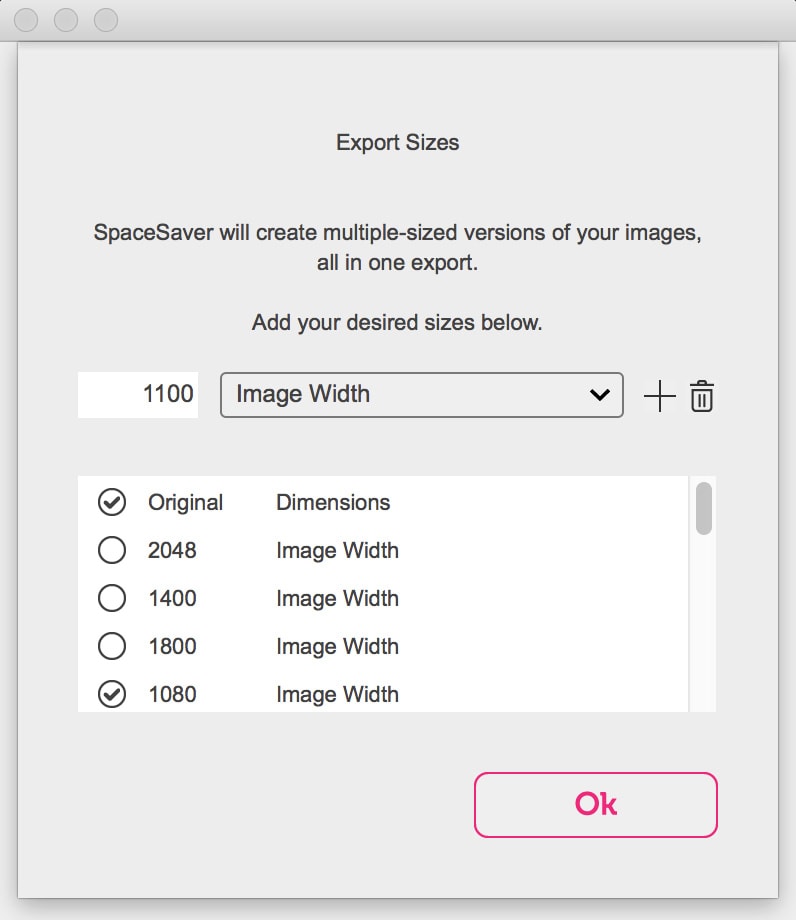
Whatever has a check mark in the circle next to the number, is the sizes you are going to export your images at to resize.
So what's checked above for me? 1080px and “Original.” (At this time you cannot uncheck “Original”.)
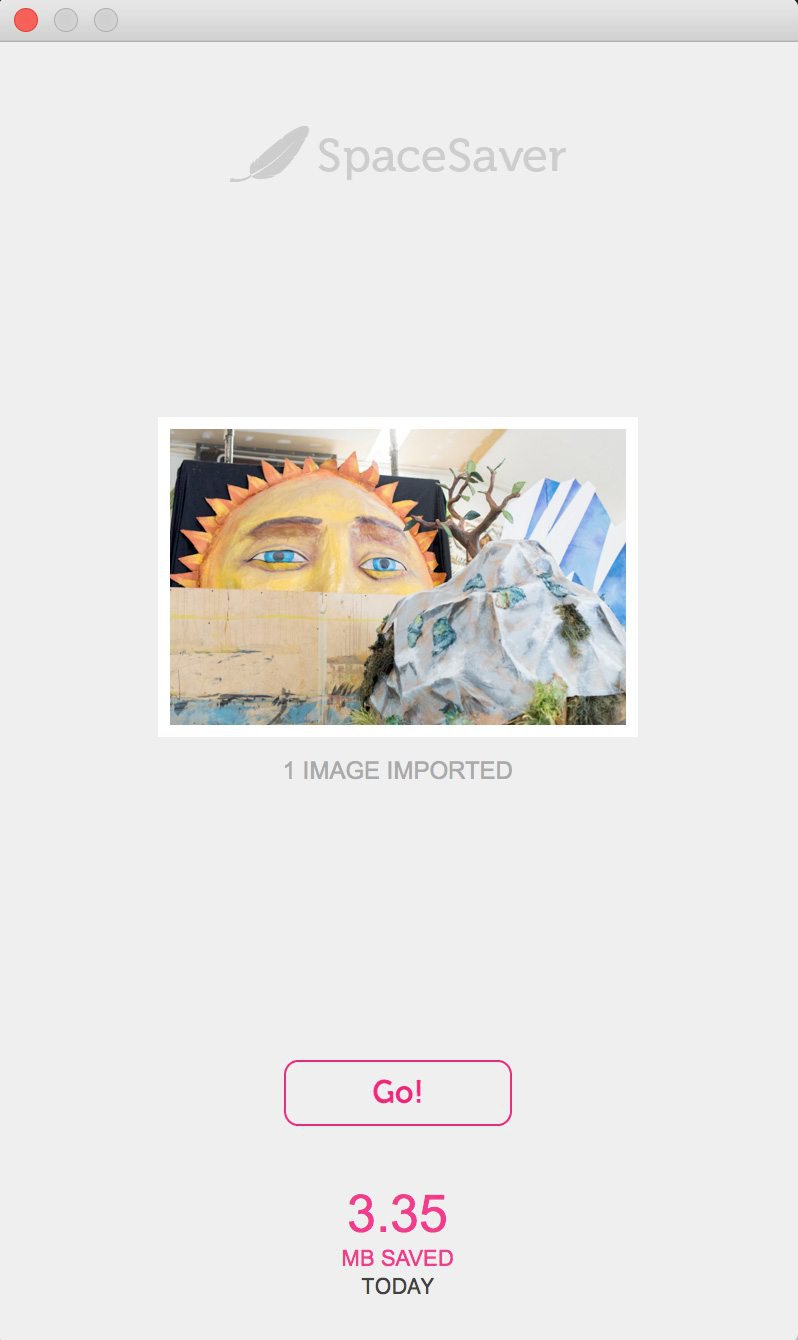
Then you simply import your images by dragging and dropping them into the program or hitting that “+” sign to locate them on your computer…and hit “GO” when you're ready to “SpaceSave” those babies! (I only resized one image in the example below.)
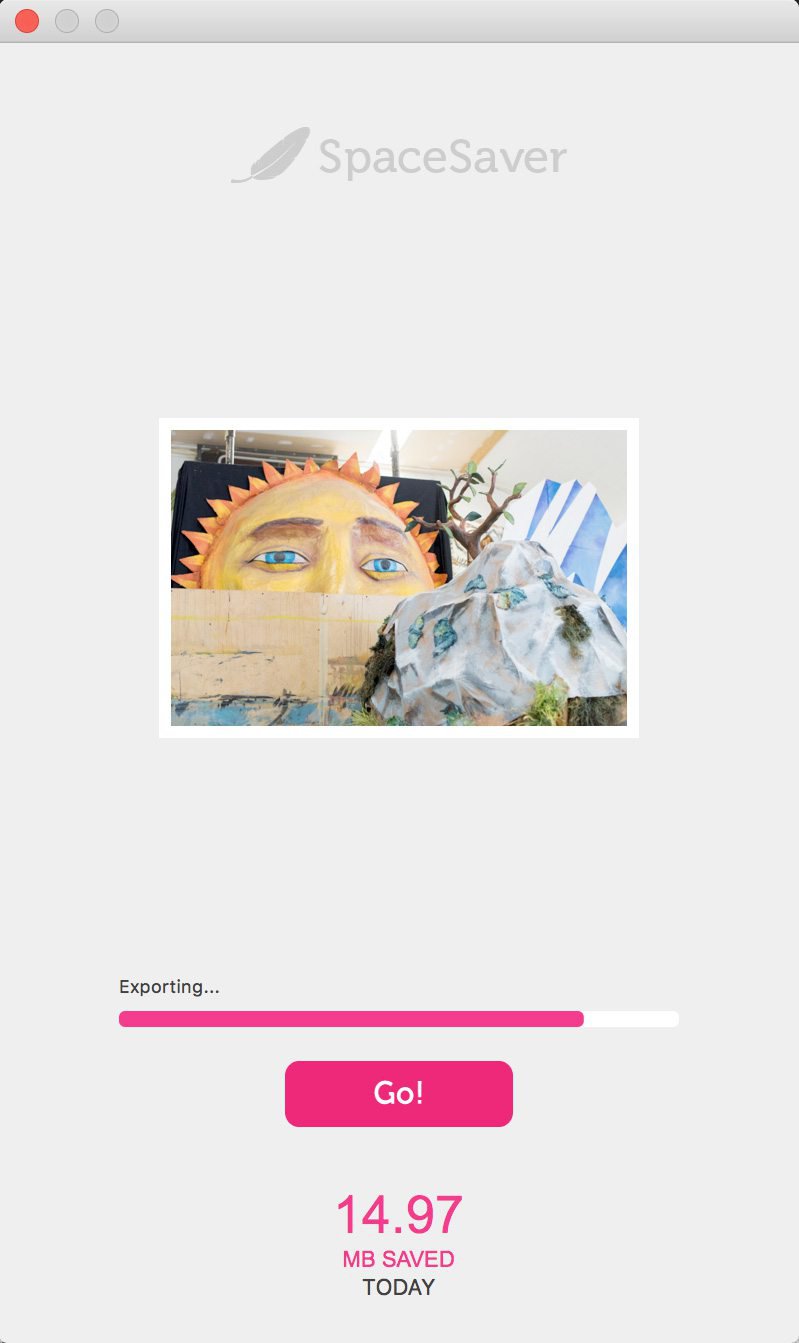
I set my SpaceSaver to automatically open the window where it saved the images afterwards. (You can set that within Settings > Open Export Folder.) Thus, it opens a Finder window on my Mac after it processes the images to downsize them without loss of quality, and looks like this:

Honestly I have no idea how it processes them. It's like magic. I've never encountered any other program or solution that so beautifully does this WITHOUT downgrading the quality of our images.
It's truly like David Copperfield goes in there to work with SpaceSaver and then I have a magician to thank for the results. But for a lot less cost of a one time program fee. Not a one-on-one with Mr. Copperfield every time I need to resize images.
Summary of How I Resized Images for Web without Losing Quality
So what did I do here? In summary, for the best way to resize images without losing quality, I used two programs to manipulate my images so they were ready to upload to our website:
- Took my original image of 16.3MG to 575KB, using BlogStomp (so I could rename it and add our watermark).
- Downsized the 575KB image created with BlogStomp, down to 337KB using SpaceSaver.
Do You Need BOTH Programs?
The answer depends on what you want to do.
If you want to easily watermark your images, create collages, and simply rename files (or a combo of any of these actions) then yes. You need BlogStomp to do so and we must, in good faith, recommend SpaceSaver too. Because it'll reduce the size of your image files even further.
If you want to resize images, only, then no. You can do that with SpaceSaver.
If you're on the fence…buy both. Truly they're so affordable you'll waste more time and energy debating the argument to yourself when you could have purchased both the moment you asked yourself the question and moved on already. 😉 (Time is money, people! Coincidentally, you can spend minimal money here to save yourself a lot of time in the long run.)
You can try both or one, or decide to purchase a combo too. It's up to you! But if you're asking us what we do – we own both, advocate for both, and use both nearly daily. And have for years.
Last Step: Upload Our Optimized, Resized Images to Our Website
It's only after we run our images through BlogStomp, then SpaceSaver that we upload them to our site. We do have image caching plugins and we have run a plugin here or there in the past with the help of Big Scoots, the love of our lives hosting company, just to get the number down for speed loading times.
But in general, these are the best programs to resize images without losing quality. It works for us. And we hope it works for you too.
For your convenience (since we're all about that), here are the links to shop and for additional details:
>>> Click here to buy BlogStomp <<<
>>> Click here to buy SpaceSaver <<<
Interested in more photography tips and info from us?
- Most Asked Travel Photography Questions and Answers
- Our Maximum and Minimal Travel Photography Gear Lists
- How to Organize and Edit Your Travel Photos: Part 1
Save one of these images to Pinterest to reference this post later: